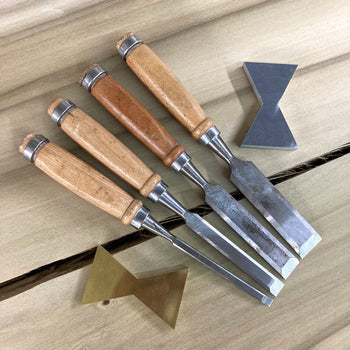


Large wood slab metal bowties offer incredible strength for those larger cracks, splits and areas where you need a big wood stitch to add strength. Simply cut a hole for the inlay to install (See below). Sand flush if needed for a raw brushed metal texture or tape off the wood, and polish to a high metal gloss.
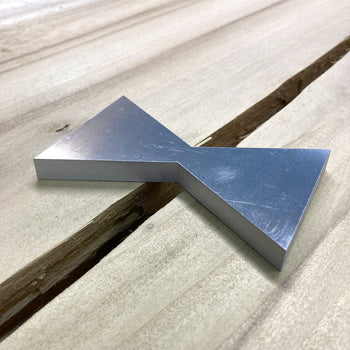
Aluminum: Bow Tie - Large: 4"L x 2-1/2"W x 3/8"H
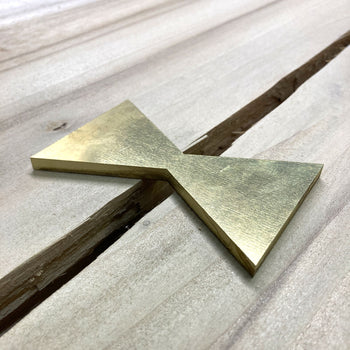
Brass: Bow Tie - Large: 4"L x 2-1/2"W x 1/4"H
Whether you call it a Bowtie, a Butterfly, a stitch, or a dutchman, it still does the same job to stabilize a crack in the wood slab or just to create an aesthetically unique look. Bowties will stop a crack in wood from getting larger and can be used on small cracks on the underside of a wood slab to be unseen.
Installing a bowtie inlay is a simple task that a lot of people over think, and it can take far less time than expected.
Tools needed:
Tracing the bowtie can be done freehand but you have to be very careful that move or shift. Some woodworkers use double sided tape or even carpet tape to secure it to the wood for tracing. The cheaper the tape the better so that it comes up easier.
With the bowtie positioned over the crack where you want it, use a marking knife to trace the bowtie inlay outside shape. Focus on making your score as close to the bowtie as possible.
Now with a medium to large sharp chisel, place the flat side toward the traced line and chop down one or two strikes with your mallet all the way around the shape. Be sure to stay away from the marking line about 1/16" or so. (Once the hole is carved out, you will go back to the line for final fine tuning.)
Next, come in with a smaller chisel bevel down and remove 1/16" - 1/8" layer of wood. This should take you down to the depth of the initial chopped line.
Repeat the prosses chopping in with a stop cut removing the wood. This will take down the wood a little more each time. Go slow and don’t rush. Remove small amounts at a time so the wood fibers don’t compress which could enlarge the cut-out bowtie shape.
This process can also be accomplished easier and faster with a bowtie template and a ¼” flush trim router bit. Once the hole is cleared, all that needs done is to trim up to the marking line with chisels.
A flat bottom is best for the epoxy adhere to the Bowtie. Carefully flattening with chisels is fine but a hand-held router makes fast work of it.
Nest put a chisel onto the marking line keeping the chisel vertically straight. Slowly chop all the way down to the bottom of the hole making sure to stay precisely on the line. Move all the way around the shape until it is as perfect and clean as possible.
Now you can dry fit and test the bowtie fit into the hole. Be careful not to get the metal bowtie stuck prematurely before you can put epoxy in the hole. The fit should be tight. More trimming around the edge may be needed to adjust the fit.
The goal to cutting out the inlay hole is to cut it deep enough so that the entire thickness of the metal bowtie fits level. If this can’t be accomplished, an orbital sander can take the metal down to the wood surface quickly.
For ease of installation, we have a taper of .005/side with the burr side indicating the larger side. This allows the inlay to snug up close to the sides as well as assist in hiding the epoxy.
Glue can work but we suggest our Quick Set Epoxy to secure the metal bowtie. Spread a small to medium amount of epoxy on the bottom of the hole and around the edge. Don’t be too sloppy. Then drive the bowtie in place. Don’t use a hammer. Use a block of wood to pound the inlay into the cavity. Epoxy should squeeze up around it on all sides. Wipe it off with acetone as soon as possible.
Use wood dust, preferably the same wood the slab is made of, mixed with epoxy and fill in any open gaps around the metal bow tie.
If you chose to sand the metal bowtie flush with the wood, you will have sanding marks. This look may be desired but if not, polishing the metal is an option.
Simply start up at the next higher grit of sanding paper you used to sand flush all the way up to the point of being able to polish. Keep in mind you may need to go fairly high with your grits.
Just carefully tape off the wood around the bowtie, sand and polish to a high gloss.
CALIFORNIA PROPOSITION 65: - None. FOR MORE INFORMATION GO TO: WWW.P65WARNINGS.CA.GOV.
From $3.85
From $5.15

© 2024 - WiseBond®, A product of DeckWise®, The Ipe Clip® Fastener Company