"Madras" 1/4" Garage Flake Floor Epoxy ResinComplete Kit

Out Of Stock
$1.00

$300 to $900 depending on sq. ft.

NOT FOR SALE YET!

Madras 1/4" Garage Flake Floor Kit Includes:

  • A-Resin and B-Hardener, 4:1 Ratio Epoxy
  • Pre-Tinted ANTIQUE WHITE Base Coat
  • Epoxy Color Flakes
  • Optional: Water-Based Urethane Gloss or Satin finish

(Based on 160 sq. ft. / Additional product included for higher sq. ft.)

Madras Flake Color Scheme:

  • 40% Wigwam
  • 30% Dolphin
  • 15% Taupe
  • 15% Alpaca White

Top Coat Options: 1-Gallon Urethane or 1-Gallon Polyaspartic. Top coat coverage per 250 sq. ft.: Urethanes 1 coat coverage - Polyaspartic 1 coat coverage. A second coat is optional depending on desired smoothness of top coat texture.

NOTE: Moisture barrier and Crack Filler sold seperately.

Sq. Ft.:

Top Coat:


We do not offer samples of our products. Why not?

APPLICATION PROCEDURES:

Read prior to purchasing!


SYSTEM FEATURES:

This Epoxy Resin Flake Floor Kit comes with more flake product in it than is needed so you’ll have all you need for a 100% broadcast flake coverage. NOTE: Each kit, depending on total sq. ft. coverage, includes enough material for 2 coats of Urethane and 1 coat of Polyaspartic - per 250 sq. ft. Whereas, the polyaspartic option single coat will be sufficient, 2 coats of urethane may be desired for a smoother surface.

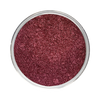
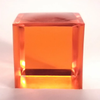
This epoxy garage floor color flake kit (also referred to as color chips, or epoxy paint chips) adds little explosions of color creating a beautiful custom garage floor with just a little creativity.

Besides the obvious advantages of custom flake color combination like this one, color flakes also provide some sound deadening qualities and hide sub-surface imperfections in your concrete. This means concrete patch work and spider cracks are less likely to show through the epoxy coating.

In addition, vinyl color flakes such as these are also flexible and strong. When applied to full refusal, they will add a minimum of 5 mils of thickness to your floor, improving both the durability and impact resistance of the surface.

Lastly, unlike epoxy the garage floor flakes are U.V. stable. If you apply them to full refusal on an epoxy coating and then clear coat with a U.V. stable polyurea or polyurethane, you will never experience ambering (yellow tint) from exposure to direct or strong indirect sunlight.

TOP COAT FEATURES AND BENEFITS

Urethane: Clear finish topcoat is available in gloss or satin finishes provides the durability of a solvent base system with the ease and safety of a low VOC (73 g/L) water base system. More user friendly than a polyaspartic and can be used on interior concrete floors. Read More Here.

  • Coverage: Approx. 300-400 square foot per gallon, per coat
  • VOC Rating: Less than 72 g/L
  • Pot Life: Approx. 30 minutes
  • Shelf Life: 1 year in original unopened container
  • Ready for recoat: 6-8 hours (18+ hours at low temperatures)
  • Light Duty Use: 24 hours (Up to 48 hours at low temperatures)
  • Heavy Traffic Ready: 3 days (Up to 5 days at low temperatures)
  • Full Cure: 5-7 days (Up to 14 days at low temperatures)
  • Appearance (cured): Clear Gloss or Satin
  • Appearance (wet): Milky Liquid
  • Odor: Sweet Acrylic
  • Application Temperature: 50 - 90 degrees Fahrenheit

Polyaspartic: Solvent chemistry which allows for quick turnaround time and faster cure for recoating. Provides a thicker mil application for a smoother one coat finish. For garage floors only. Not for interior home concrete floors. Read More Here.

  • Coverage: Approx. 300-400 square foot per gallon, per coat
  • VOC Rating: Less than 330 g/L
  • Pot Life: Approx. 30 minutes
  • Shelf Life: 1 year in original unopened container
  • Ready for recoat: 1-2 hours (4-5 hours at low temperatures)
  • Light Duty Use: 3-4 hours (24-36 hours at low temperatures)
  • Heavy Traffic Ready: 24-36 hours (3-4 days at low temperatures)
  • Full Cure: 1-2 days (Up to 7 days at low temperatures)
  • Appearance (cured): Clear Gloss
  • Appearance (wet): Clear
  • Odor: Aromatic (strong)
  • Application Temperature: 32 - 90 degrees Fahrenheit

QUICK FACTS:

COVERAGE
VARIES UPON SUBSTRATE; APPROX. 200-300 BASE COAT KIT
(100-150 SQ FT/GALLON)

PACKAGING
Available in 2-gallon kits
Kit includes: base coat epoxy, pigment, flakes, and top coat.
Depending on square footage, larger sq. ft. selections will come with additional material to cover your specific square footage.

(1) Gallon Part A, Black
(1) Gallon Part B, Clear

*Base Coat pigments, top coats, and flakes also sold separately for custom design floors.

SHELF LIFE
2 years in original, unopened container stored between 40°F-90°F (40°C-32°C), and out of direct sunlight.

NOTE: Do NOT skip prepping your garage floor properly! This is the most important part of the application to ensure a good bond. Mechanically grinding the surface of your garage floor is a must if your garage floor has oil stains, cracks – should be filled, dirt, moisture or an old garage floor coating. All of these will need to be completely removed prior to applying new epoxy flakes.

Once your kit is purchased we will email the step-by-step tutorials on how to install this kit. These tutorials will be on the emailed receipt and sent to the email you use during the checkout process.

Note: If you live in a more humid climate, an area where there’s a lot of rain, or just need protection against moisture, in addition to this floor kit, you may also want to purchase our Vapor Barrier from our Single Items store.

Pour at temperatures between 77°F- 85°F with low humidity in a dust free environment. Allow 24 hours for initial cure. Wait 3 days for a full hard cure.

NOTE: Do NOT skip prepping your garage floor properly!
For instructions and how to prepare your garage floor read GARAGE FLOOR PREPARATION.

How Do You Apply WiseBond® Garage Floor System with Epoxy Floor Flake Chips?

  1. Clean and resurface the floor with a floor grinder or self-leveling concrete; fill all cracks and holes; level crack and hole fills.
  2. For a proper bond, the surface of concrete must be opened up or roughed up to feel like 80 – 180 grit sandpaper. This profile is best accomplished through diamond grinding or shot blasting.
  3. Make sure your concrete floor is not retaining moisture. Test this by taping a 2 ft. x 2 ft. plastic sheet (garbage bag) to the floor, and leave it overnight. If there are water bubbles or spots under the plastic, the concrete is retaining moisture. Apply a water barrier primer and let dry for 24 hours if needed.
  4. Every 2 gallons of epoxy base coat covers 250 sq. ft. of concrete floor. If the area you are working with is any larger than 250 sq. ft., mark 250 ;sq. ft. by starting at the wall, and marking your endpoint with blue painters tape on the wall. This will make sure you don't use too much or too little product for your desired result. Mix epoxy appropriately for your specific coverage.
  5. If the walls have already been painted, use blue painters tape around the edges where your wall and your floor meet while leaving a 2 millimeter gap above the floor. If any foundation block/base board area along the walls require epoxy and flakes, tape that off above as well.
  6. Measure and mix part A & B of floor epoxy at a 1:1 ratio. Add your epoxy base coat colorant pigment and mix thoroughly. This will match the color of your flakes.
  7. Squeegee the base coat epoxy onto your 250 square foot area. Be sure to wear spike shoes!
  8. Spread and backroll the epoxy with a paint roller. (NOTE: Be sure to roll the paint roller on blue painters’ tape beforehand to remove loose fibers).
  9. While the base coat is still wet, throw/flick the flakes into the air and let them fall onto your epoxy (use a chicken feeding motion). Cover the entire floor with flakes evenly.
  10. Once cures, (usually 12-24 hours later) scrape vertical flakes with a trowel or use a stiff brush to knock down flakes. Vacuum the leftover flakes.
  11. Mix, pour and roll the polyaspartic or urethane topcoat to seal your flakes. Let cure 24 hours before walking on and 48 hours before driving on.

REQUIRED TOOLS AND SUPPLIES

The following is a list of tools and supplies that you will need. If you are purchasing a garage floor epoxy kit from an online vendor, some of these tools and supplies may be included with the kit.

We also included optional tools such as 18" rollers. They are not mandatory, but the wider rollers make the application process go much quicker. We highly recommend these if you are covering areas larger than 500 sq. ft.

  • Tarp for mixing station (6x8 works well) -Home Depot, Lowes, etc.
  • Variable speed drill -Home Depot, Lowes, etc.
  • WiseBond - Mixing Paddle
  • Paint stir sticks -Home Depot, Lowes, etc.
  • 1qt., 2.5qt., & 5qt. calibrated containers – for mixing quantities for smaller sections -Amazon
  • 3 gallon or 5-gallon buckets for mixing (1 for each coat plus any additional for batch mixing) -Home Depot, Lowes, etc.
  • Latex gloves -Amazon
  • Rags -Amazon
  • 1 gal. MEK or acetone for clean up -Home Depot, Lowes, etc.
  • 9" roller frame -Amazon
  • 3/8" nap premium lint free phenolic core rollers (1 for each coating) -Home Depot, Lowes, etc.
  • Standard paint tray and liners (for water-based epoxy or polyurea and polyurethane coatings) -Home Depot, Lowes, etc.
  • Threaded pole extension for roller frame -Home Depot, Lowes, etc.
  • 3 Chip brushes (1 for each coat) -Amazon
  • Spiked shoes for full color flake floors (1 pair for each installer) -Amazon
  • 10" drywall taping knife (for heavy color flaked floors) -Home Depot, Lowes, etc.
  • Heavy duty painters' tape -Home Depot, Lowes, etc.
  • Cheap plastic drop cloths -Home Depot, Lowes, etc.

    Optional Tools
  • 18" roller frame -Home Depot, Lowes, etc.
  • 18" 3/8" premium lint free phenolic core rollers (1 for each coating) -Home Depot, Lowes, etc.
  • 18" painters' tray -Home Depot, Lowes, etc.

Why Spiked Shoes? Spiked shoes allow you to walk out onto the coating during installation and for tossing the color flakes. We recommend a pair for each installer. Why 18" Items? The 18" roller frames, rollers, and paint tray can easily be purchased online. Some home improvement centers carry them. These products greatly improve the speed and ease of applying a garage floor coating.

Tip: Do not go cheap with the rollers and never try to reuse them for additional coats. Use premium lint free phenolic core rollers to ensure a blemish free coating. Examples are Epoxy Glide, pro/doo-Z, and Purdy. Having 1 or 2 extra is highly recommended.

PART A - CALIFORNIA PROPOSITION 65: This product contains a chemical(s) known to the state of California to cause cancer, birth defects or reproductive harm, which are subject to the requirements of California Proposition 65. FOR MORE INFORMATION GO TO: WWW.P65WARNINGS.CA.GOV.

PART B - CALIFORNIA PROPOSITION 65: This product contains a chemical(s) known to the state of California to cause cancer, birth defects or reproductive harm, which are subject to the requirements of California Proposition 65. FOR MORE INFORMATION GO TO: WWW.P65WARNINGS.CA.GOV.